
In Short
This article explains one structured framework, the C.O.U.R.A.G.E. Method, covering all seven steps that help you make high-stakes team decisions with clarity and confidence.
- The method prevents reactive decisions that fracture team alignment.
- It gives you a transparent rationale your team can trust and respect.
- It works best when pressure is highest and instinct alone is not enough.
Synergy decisions confidence refers to the ability to make high-stakes choices that affect your team's collective alignment and performance, using a structured process that keeps your values, your people, and your rationale clear even when the pressure is intense.
There was a team leader I knew years ago, a capable, well-meaning woman who had built genuine trust with her people. When a crisis hit and two key members fell into open conflict, she made a fast call to separate their responsibilities without consulting anyone. She meant well. She acted quickly. And she watched the team fracture because nobody understood why she had done it, and nobody had been part of the thinking.
High-stakes decisions that affect team synergy are not won by speed alone. They are won by structure. Without a clear method, even experienced leaders default to gut instinct, and gut instinct under pressure tends to protect the leader more than it serves the team. The C.O.U.R.A.G.E. Method exists precisely for these moments.
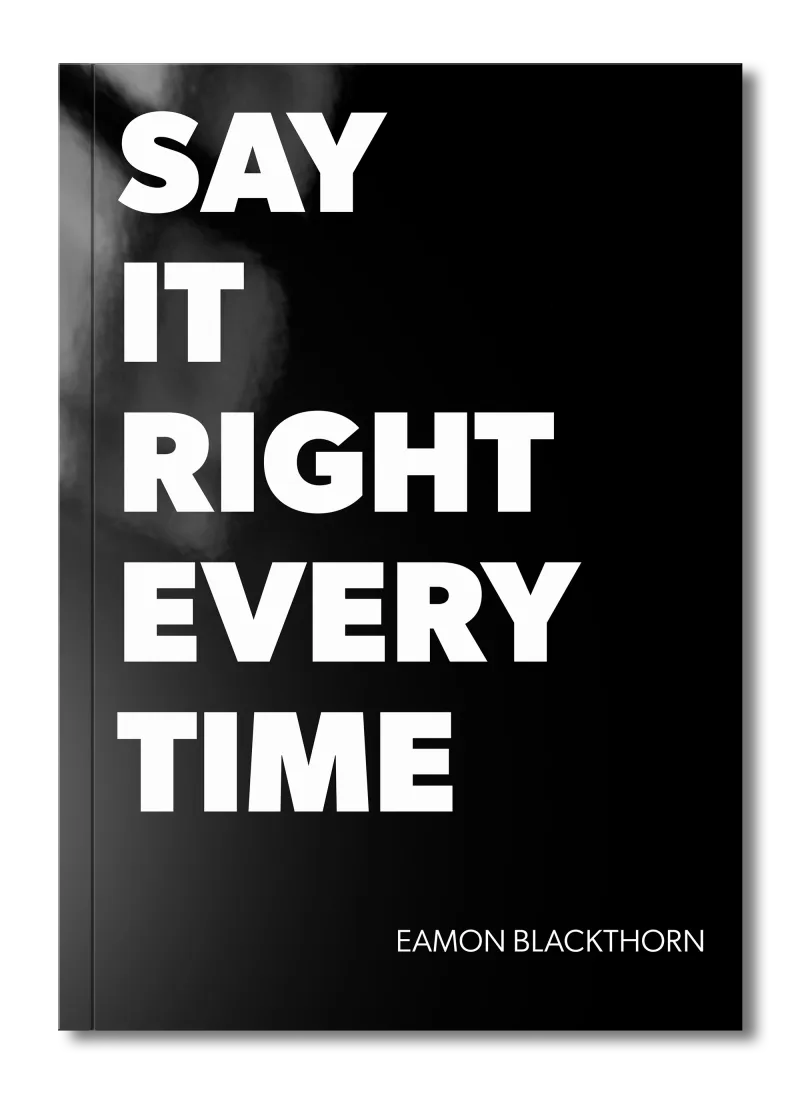
In this article, you will learn the complete seven-step C.O.U.R.A.G.E. framework that I introduce in Say It Right Every Time, drawn from Chapter 7 on leading with courage and clarity. Each step is explained fully, with practical examples showing how to apply it to the real synergy challenges your team will face.
If you want to explore how to prepare your team for high-pressure conversations before a decision is reached, the article Why Team Synergy Breaks Down During High-Pressure Projects and How to Prevent It gives you the wider context.
Why Structure Matters More Than You Think in High-Stakes Team Decisions
Most people believe that good leadership in a crisis comes down to confidence and experience. It does not. It comes down to having a process that holds when your emotions are pushing you to react.
When the pressure is on, the absence of structure does real damage to team synergy:
- When a team leader reshuffles roles without explaining the reasoning, capable people feel sidelined and stop contributing fully, because they cannot tell whether the change reflects a failure on their part.
- When a conflict between two team members is resolved with a rushed decision, the rest of the team draws their own conclusions about who was blamed, and those conclusions are rarely accurate.
- When a strategic pivot is announced without context, the collective energy that holds a team together drains quickly, because uncertainty breeds disengagement faster than almost anything else.
- When a leader acts from instinct rather than a clear framework, team members cannot predict how future decisions will be made, and that unpredictability erodes the psychological safety your team needs to perform.
- When the rationale behind a major call is never explained, even people who would have agreed with the decision begin to distrust the process, because silence breeds fear and uncertainty.
The C.O.U.R.A.G.E. Method gives you a reliable structure for every one of these moments. Use it until it becomes instinct.
"The Conversation You're Avoiding Is the One You Need to Have."
"The Conversation You're Avoiding
Is the One You Need to Have."
Stop rehearsing conversations you'll never have. Say It Right Every Time gives you 115 word-for-word scripts and 16 proven frameworks to speak with confidence in every conversation that matters.
The C.O.U.R.A.G.E. Method: A Seven-Step Framework for High-Stakes Synergy Decisions
The C.O.U.R.A.G.E. Method is a seven-step decision-making framework I introduce in Chapter 7 of Say It Right Every Time. It was designed for the moments when the stakes are real, the pressure is high, and the way you make a decision matters as much as the decision itself. Each letter stands for a distinct step in the process.
Step 1: C. Collect Information
Name and plain-language summary: The first step is to gather what you actually know before forming any opinion. This means resisting the urge to act until you have a clear picture of the facts on the ground.
What it is designed for: This step addresses the most common failure in high-pressure team situations: making decisions based on incomplete information because speed felt necessary.
How it works:
Talk to the people closest to the situation. Go directly to the team members involved, not just those above them. Ask open questions and listen without interrupting. For example: "Can you walk me through what happened from your perspective?"
Separate fact from interpretation. Write down what you know for certain versus what you have been told by one person. For example: "The deadline was missed" is a fact. "They didn't care" is an interpretation.
Identify what you still do not know. Name the gaps before you proceed. For example: "I don't yet know whether the resource shortage was flagged earlier or not."
When to use it: Use this step at the very start of any decision that affects team roles, responsibilities, or working relationships. Take it seriously even when you feel you already know the answer.
When not to use it: If a situation requires an immediate safety or legal response, act first and investigate afterwards. Do not let information-gathering become a delay tactic.
A quick example in practice: A senior developer and a project manager are in open conflict about a missed client milestone. Before drawing any conclusions, you speak to both separately, review the original brief, and check the resource log. You discover the developer flagged a resourcing gap three weeks earlier and received no response. That fact changes everything about the decision you are about to make.
Eamon's take: I have made the mistake of acting on the first version of events I heard. It cost me trust I had spent months building. Collect the full picture first, every time.
Step 2: O. Outline the Options
Name and plain-language summary: Once you have the facts, map out every realistic path forward before committing to any one of them. This step forces you to think before you choose.
What it is designed for: It prevents tunnel vision, the natural tendency under pressure to see only one possible response and pursue it without considering alternatives.
How it works:
Write out at least three options. Even if one option seems obviously right, name two others. For example: "Option A: Restructure the responsibilities. Option B: Bring in additional resource. Option C: Renegotiate the timeline with the client."
Name the strengths and risks of each. A single sentence per option is enough at this stage. For example: "Option A resolves the conflict quickly but may feel punitive to one party."
Include the option of doing nothing. Sometimes inaction is a genuine choice with real consequences. Name it honestly. For example: "Option D: Hold the current structure and address the communication breakdown directly."
When to use it: Any time a team decision involves trade-offs that affect more than one person. This is especially important when the team is watching how you handle the situation.
When not to use it: Do not spend hours outlining options for low-stakes, reversible decisions. Reserve this step for the calls that are hard to undo.
A quick example in practice: Facing the developer and project manager conflict, you outline four responses: address the communication failure directly, separate the two team members, escalate to senior management, or redesign the handoff process entirely. Writing them out reveals that the real issue is a process gap, not a personality clash. That insight shapes every step that follows.
Eamon's take: The act of writing out your options before choosing is itself a form of respect for the people affected. It tells you that you thought carefully, not just quickly.
Step 3: U. Understand the Impact
Name and plain-language summary: Before you act, think clearly about who will be affected, how they will be affected, and what it will mean for your team's ability to work together going forward.
What it is designed for: This step protects team cohesion by forcing you to think beyond the immediate problem to the broader effect on collective trust, morale, and working relationships.
How it works:
Map the direct impact. Who is immediately affected by each option, and what will they experience? For example: "Restructuring roles directly affects the developer's sense of ownership over the project."
Map the ripple effect. What will the rest of the team conclude about how decisions get made here? For example: "If the team sees one person moved without explanation, they will wonder whether they are next."
Consider the long-term signal. What does this decision communicate about how this team operates? For example: "Acting without transparency now makes it harder to ask for trust later."
When to use it: Always, before finalising any decision that involves people's roles, performance, or standing within the team. This is where psychological safety is either protected or damaged.
When not to use it: Do not use this step to talk yourself out of a necessary but uncomfortable decision. Understanding impact is not the same as avoiding action.
A quick example in practice: You are considering separating two conflicting team members. The direct impact is reduced friction. The ripple effect is that others will interpret the separation as blame being assigned. The long-term signal is that conflict leads to isolation rather than resolution. This analysis tells you that the separation needs to be accompanied by a clear, public explanation, not handled quietly.
Eamon's take: Most leaders underestimate how much the rest of the team is watching. Every decision you make in private becomes public the moment it is implemented.
Step 4: R. Review Your Values
Name and plain-language summary: Before you act, check your decision against the values that matter to you and to your team. This step is the conscience of the method.
What it is designed for: It prevents decisions made out of convenience, self-protection, or political pressure from being dressed up as principled leadership.
How it works:
Name your core team values explicitly. Write them down: honesty, fairness, accountability, collective performance. For example: "We value transparency in how decisions get made."
Test each option against those values. Ask directly whether this choice honours or compromises what you stand for. For example: "Does deciding without involving the team honour our commitment to transparency? No, it does not."
Choose clarity over comfort. As I write in Chapter 7 of Say It Right Every Time: "Your job as a leader is to be clear, not to be comfortable." For example: "The honest option is harder to communicate. It is still the right one."
When to use it: Whenever you sense you are rationalising a choice rather than making it. If you are working hard to justify something, this step will tell you why.
When not to use it: Do not use this step to delay action indefinitely while you seek perfect moral clarity. Most decisions carry some trade-off. The question is which trade-off you can live with and defend.
A quick example in practice: You are tempted to quietly reassign the project manager to avoid a difficult conversation. You review your team's commitment to direct communication and honest accountability. The quiet reassignment fails that test. You choose the harder path: a direct conversation with both parties that addresses the issue openly and gives both people a chance to be heard.
Eamon's take: The values check is the step most leaders skip when they are under pressure. That is exactly when it matters most.
Step 5: A. Act with Conviction
Name and plain-language summary: Once you have done the work of the previous four steps, commit fully to your decision and execute it without wavering.
What it is designed for: This step addresses the paralysis that comes from over-thinking, and the damage caused by leaders who act half-heartedly after making a decision their team can sense they are not confident in.
How it works:
Decide and communicate clearly. State your decision in plain language with no hedging. For example: "We are redesigning the handoff process between development and project management, starting this week."
Assign clear ownership. Name who is responsible for what, and by when. For example: "I am asking you both to co-design the new process and bring a draft back to the team in five working days."
Do not revisit the decision publicly unless new information demands it. Changing your mind under pressure teaches your team that pressure works. For example: "I have heard your concern. The decision stands. Here is why."
When to use it: After you have genuinely completed steps one through four. Conviction is earned through preparation, not assumed through authority. The article How the M.A.S.T.E.R. Method Prepares Teams for High-Stakes Synergy Conversations covers the preparation work that makes conviction possible.
When not to use it: Do not act with conviction when you have skipped the earlier steps. Conviction without preparation is stubbornness dressed up as leadership.
A quick example in practice: After collecting facts, mapping options, understanding the impact, and testing the decision against your values, you call both team members in and state clearly: "The process between your two roles needs to change. Here is what we are doing and why. I need both of you committed to this." You do not apologise for the decision or invite a renegotiation of it.
Eamon's take: Your team does not need you to be certain. They need you to be committed. There is a real difference between the two.
Step 6: G. Gauge the Reaction
Name and plain-language summary: After you have acted, pay close attention to how your team responds, individually and collectively. This step closes the loop between your decision and its real-world effect.
What it is designed for: It prevents you from assuming that a decision well-made is a decision well-received. Team synergy lives in the gap between what you intended and what your people actually experienced.
How it works:
Watch the room after you communicate. Body language, silence, and side conversations tell you more than formal feedback channels. For example: "Two team members went quiet in the meeting and have not spoken to each other since. That silence is information."
Ask directly in one-to-one conversations. Create space for honest responses. For example: "I want to check in with you about how the restructure is landing. What are you noticing?"
Distinguish between discomfort and disagreement. Some reactions signal emotional adjustment; others signal genuine misalignment that needs addressing. For example: "She is frustrated right now but agreed with the reasoning. He is questioning the premise entirely. Those require different responses."
When to use it: In the days immediately following any significant team decision. Do not wait for formal review cycles; gauge reaction while the window for repair is still open. The article How to Give Feedback That Strengthens Team Synergy Instead of Breaking It gives you the tools to respond to what you hear.
When not to use it: Do not use this step as an invitation to reverse course every time someone expresses discomfort. You are gauging in order to respond thoughtfully, not to undo the decision.
A quick example in practice: Three days after announcing the handoff process redesign, you notice that the developer is engaged and energised, but the project manager has become withdrawn in team meetings. You request a one-to-one conversation, ask what she is noticing, and discover she interpreted the change as a signal that she was to blame for the original conflict. That is not the message you intended. Now you can correct it.
Eamon's take: A decision that lands badly is not automatically the wrong decision. But a leader who does not notice how it landed is not leading; they are just issuing instructions.
Step 7: E. Explain Your Rationale
Name and plain-language summary: Close the loop by telling your team clearly why you made the decision you made, in plain language that connects back to the values and information that guided you.
What it is designed for: This step is what separates leaders who build lasting team trust from those who generate compliance. Your team does not just need to know what you decided. They need to understand why.
How it works:
Name the information that drove your thinking. Be specific, not vague. For example: "I looked at the resource log from the past six weeks and spoke to both of you individually before deciding anything."
Connect the decision to shared values. Show the thread between your values and your action. For example: "We have always said that process problems need process solutions. That is what guided this call."
Acknowledge what was difficult about it. Honesty about the trade-offs you faced builds more trust than projecting certainty. For example: "I know this change creates more work in the short term. I believe it prevents a much bigger breakdown further down the line."
When to use it: Always. Every significant decision affecting team synergy deserves a clear, transparent rationale. Role clarity, as explored in What Is Role Clarity and Why It Is the Foundation of Sustainable Team Synergy, depends on people understanding not just what they are doing but why.
When not to use it: Do not use the explanation as a way to seek approval after the fact. You are communicating your reasoning, not inviting a vote.
A quick example in practice: In your next team meeting, you say: "I want to close the loop on the process change I announced last week. I made that call because the resource gap had been flagged and not acted on, and that created an unfair situation. The new handoff structure addresses the root cause. I know it adds a step to your workflow. I believe it will protect the quality of your work and your relationship with each other." The team exhales. The decision was already made. Now it makes sense.
Eamon's take: Silence after a decision is not leadership. Explanation is. As I write in Say It Right Every Time: "Leadership is not about having all the answers. It is about having the courage to act when you do not."
How to Choose the Right Step to Start With for Your Synergy Situation
Knowing the framework is only half the work. Knowing where to focus your energy within it is the other half.
| Situation | Step to Prioritise |
|---|---|
| You have acted quickly and the team seems unsettled | G: Gauge the Reaction |
| You are facing a conflict between two team members | C: Collect Information |
| The team understands what was decided but not why | E: Explain Your Rationale |
| You know the facts but are struggling to choose a path | O: Outline the Options |
| You sense you are about to make a politically convenient choice | R: Review Your Values |
| The team is waiting for a decision and losing confidence | A: Act with Conviction |
| You are unsure who will be affected and how | U: Understand the Impact |
In practice, you will often find that two steps are calling for your attention at once. When that happens, always complete the earlier step first. You cannot genuinely act with conviction in step five if you have skipped the values review in step four. The sequence matters.
For decisions where you have already committed and are now managing the aftermath, start at step six and work forward. The framework applies both before and after you act.
When in doubt, start with the simplest step available to you. Complexity is not strength.
Common Mistakes When Using the C.O.U.R.A.G.E. Framework
The framework only works when you follow it with honest discipline, not as a checklist you race through to justify a decision you have already made.
Collecting only the information that confirms what you already think. This is the most common failure at step one. Go to the people who might tell you something inconvenient. Their perspective is exactly the one you need.
Outlining options without seriously considering them. Writing three options and immediately dismissing two is not outlining; it is performance. Give each option genuine weight before moving forward.
Skipping the values review when speed feels urgent. Pressure creates a strong pull toward action. That pull is precisely when the values check matters most. The fastest decisions made under pressure are the ones most likely to damage long-term team cohesion, as discussed in How to Prepare for a High-Stakes Team Conversation Using the M.A.S.T.E.R. Method.
Acting with conviction before completing the earlier steps. Confidence without preparation is not conviction; it is arrogance. Your team will feel the difference.
Explaining your rationale as a defensive move rather than an act of transparency. If your explanation sounds like you are defending yourself, your team will hear it that way too. Explain to inform, not to protect.
A framework used carelessly is still better than no framework. But a framework used with honesty and discipline is a genuine advantage for every team you lead.
How to Start Using the C.O.U.R.A.G.E. Method in Your Team Today
Do not try to master all seven steps at once in a live high-stakes situation.
Start with the step you most often skip. Most leaders are weakest at either the values review or the rationale explanation. Identify your gap and practise that single step in your next low-stakes decision. Build the muscle before you need it under pressure.
Use a real decision from the past week as a test run. Take a decision you have already made and walk it backwards through the seven steps. Where did you skip a step? What would have changed if you had not? This retrospective practice builds pattern recognition faster than any other method.
Introduce the framework to your team explicitly. Tell them you are using a structured approach to high-stakes decisions. When they know the method exists, they trust the process more, even before they see a result. The article How to Use the G.R.O.W. Method to Turn Team Feedback Into a Synergy Improvement Plan pairs well here as a tool for turning their responses into forward action.
Apply the full seven-step method to one real decision this month. Choose a genuine challenge your team is facing, not a hypothetical. Work through every step in writing before you communicate anything. Notice how the written process changes the quality of your decision.
Frameworks are tools. The more you use them, the less you have to think about them.
Key Takeaways
Here is what to carry with you from this article.
- The C.O.U.R.A.G.E. Method gives you a seven-step structure for making high-stakes synergy decisions with clarity, conviction, and transparent rationale.
- Collecting full information before forming an opinion is the hardest step and the most important one.
- Reviewing your values before acting protects your team from decisions made out of convenience rather than principle.
- Explaining your rationale after the fact is not a sign of weakness; it is the step that converts a decision into lasting team trust.
- Gauging the reaction after you act closes the gap between your intention and your team's actual experience.
- The framework works before and after a decision; it is never too late to complete the steps you skipped.
If you want to build the preparation skills that make this method even more effective, read How the M.A.S.T.E.R. Method Prepares Teams for High-Stakes Synergy Conversations and What Is Psychological Safety and How It Drives Team Synergy. The full C.O.U.R.A.G.E. framework, alongside the L.E.A.D. and S.B.I. methods, is covered in detail in Chapter 7 of Say It Right Every Time.
Building synergy decisions confidence is a practice, not a gift. Start with one step, apply it honestly, and trust the structure to do the rest of the work.
Frequently Asked Questions (FAQ)
What is the C.O.U.R.A.G.E. Method for synergy decisions?
The C.O.U.R.A.G.E. Method is a seven-step framework for making high-stakes team decisions with clarity. It stands for Collect Information, Outline the Options, Understand the Impact, Review Your Values, Act with Conviction, Gauge the Reaction, and Explain Your Rationale. It keeps your team aligned when pressure is highest.
How do you use the C.O.U.R.A.G.E. Method to build team confidence?
You use the C.O.U.R.A.G.E. Method by working through each step in sequence before and after a high-stakes decision. The structure prevents reactive choices and gives your team a transparent rationale they can trust. Confidence grows when people see a clear, values-based process behind every major call.
When should you apply the C.O.U.R.A.G.E. Method for synergy decisions confidence?
Apply it whenever a team decision carries real consequences: restructuring responsibilities, addressing persistent conflict, responding to a sudden project crisis, or communicating a strategic change. The method works best when emotions are running high and the temptation to act without thinking is strongest.
How does the C.O.U.R.A.G.E. Method support team synergy under pressure?
It supports team synergy by making the decision-making process visible and values-driven. When your team sees that you collected facts, considered impact, and acted from conviction rather than panic, trust deepens. That trust is the foundation of sustained collective performance under pressure.
What is the difference between the C.O.U.R.A.G.E. Method and the L.E.A.D. Method?
The C.O.U.R.A.G.E. Method guides high-stakes decisions before and after you act, focusing on information, values, and rationale. The L.E.A.D. Method structures the leadership conversation itself: Listen First, Empathize, Articulate Your Vision, and Define the Next Steps. They complement each other in high-pressure team situations.
Can the C.O.U.R.A.G.E. Method be used for everyday synergy decisions?
It can, but it is designed for decisions with real consequences for your team's cohesion, direction, or performance. For routine choices, a lighter process is faster. Save the full seven-step method for moments where getting it wrong would damage trust, alignment, or the team's ability to work together.